If you’re looking to upgrade your home’s appearance, refinishing your floors is a fantastic option. This article will guide you through various techniques and tips to achieve stunning results. From understanding the basics to choosing the right finish, we’ve got you covered. Let’s explore the best floor refinishing methods that can transform your space into something beautiful.
Thank you for reading this post, don't forget to subscribe!Key Takeaways
- Refinishing can restore the beauty of worn-out floors and increase your home’s value.
- Different techniques like sanding, screening, and buffing offer various benefits depending on your floor’s condition.
- Choosing the right finish, whether water-based or oil-based, is crucial for durability and appearance.
- Proper preparation and maintenance can extend the life of your refinished floors.
- Consider eco-friendly options for a sustainable approach to floor refinishing.
Understanding the Basics of Floor Refinishing
What is Floor Refinishing?
Floor refinishing is the process of restoring the beauty of your hardwood floors by sanding down the top layer and applying a new finish. This comprehensive process not only removes scratches and stains but also brings back the original shine of the wood. Unlike resurfacing, which simply adds a new layer of finish, refinishing strips away the old finish entirely.
Benefits of Refinishing Your Floors
Refinishing your floors offers several advantages:
- Restores Appearance: Old, worn floors can look brand new, enhancing your home’s overall aesthetic.
- Increases Longevity: Properly refinished floors can last many more years, protecting your investment.
- Adds Value: Well-maintained hardwood floors can increase the value of your home, making it more appealing to potential buyers.
Common Misconceptions About Floor Refinishing
Many homeowners have misconceptions about floor refinishing. Here are a few:
- It’s Too Expensive: While costs can vary, refinishing is often more affordable than replacing floors.
- It’s a DIY Job: Although some may attempt it, hiring professionals ensures optimal results and longevity of your floors.
- It’s Only for Damaged Floors: Even floors that look good can benefit from refinishing to maintain their beauty and durability.
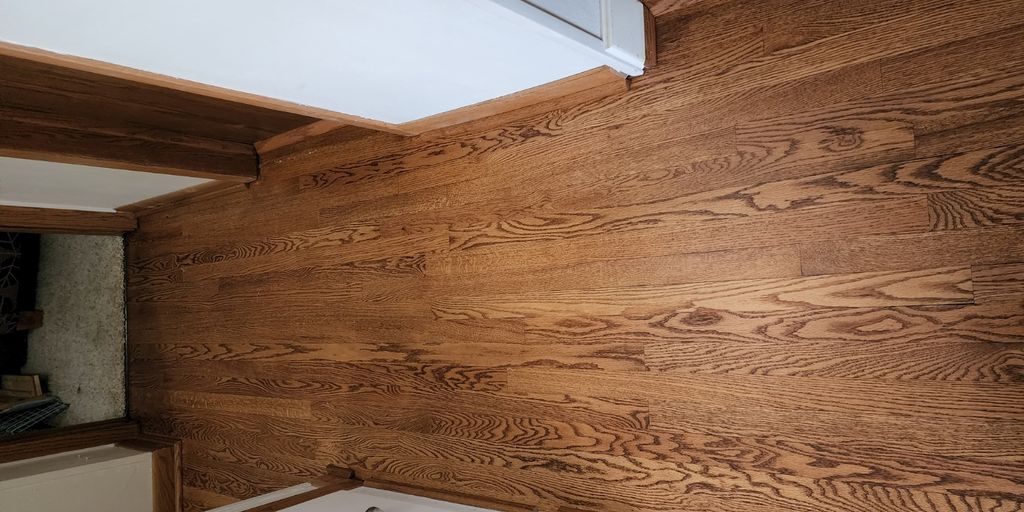
Refinishing hardwood floors is a transformative process that breathes life into your home, elevating its beauty and value.
Choosing the Right Refinishing Technique

When it comes to refinishing your floors, selecting the right technique is crucial for achieving the best results. Here are three popular methods:
Sanding and Refinishing
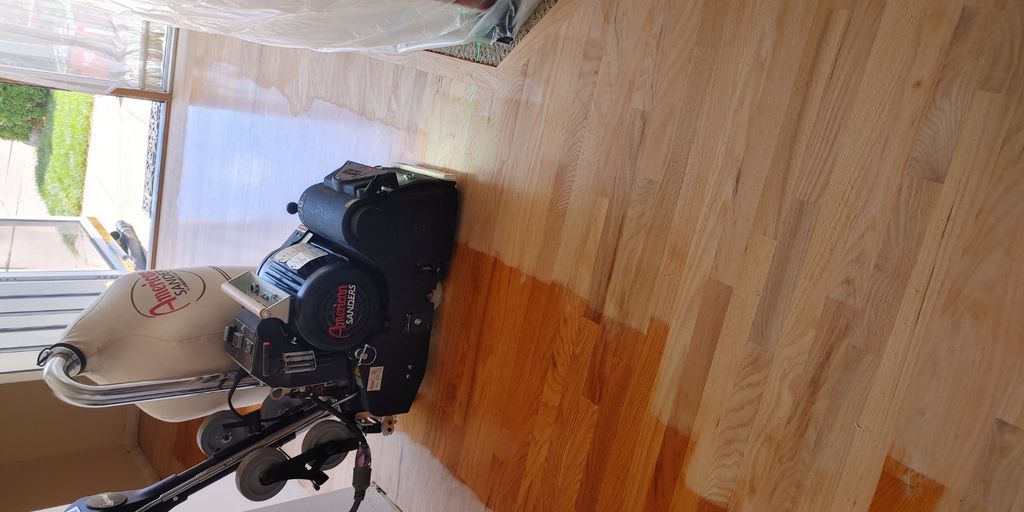
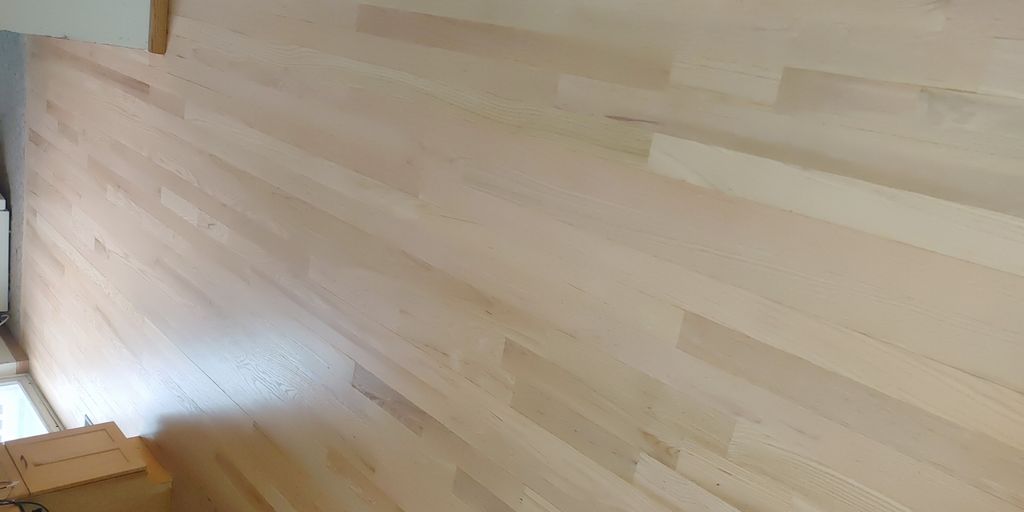
Sanding and refinishing is the most thorough method. It involves removing the old finish and sanding the wood down to its bare surface. This technique is ideal for floors with deep scratches or significant wear. Here’s what you need to know:
- Pros: Restores the original beauty of the wood.
- Cons: Time-consuming and requires proper equipment.
- Best for: Floors that are heavily damaged or have multiple layers of finish.
Screening and Recoating
Screening and recoating is a less invasive option. This method lightly sands the surface to prepare it for a new coat of finish. It’s perfect for floors that are in decent condition but need a refresh. Consider these points:
- Pros: Quick and cost-effective.
- Cons: Doesn’t address deep scratches or damage.
- Best for: Floors that have minor wear and tear.
Buffing and Polishing
Buffing and polishing is a maintenance technique that enhances the shine of your floors. It’s not a full refinishing but can make a significant difference in appearance. Here’s a quick overview:
- Pros: Fast and easy to do.
- Cons: Temporary solution; won’t fix deeper issues.
- Best for: Regular maintenance of well-kept floors.
Remember, the right technique can significantly impact the look and longevity of your floors. Assess your floor’s condition and choose accordingly!
Selecting the Best Floor Finish
Choosing the right finish for your floors is essential for both aesthetics and durability. A well-selected finish can enhance the beauty of your wood while providing protection against wear and tear. Here are some key considerations:
Water-Based vs. Oil-Based Finishes
- Water-Based Finishes: These are quick-drying and low in VOCs, making them a popular choice for homeowners. They provide a clear finish that doesn’t yellow over time.
- Oil-Based Finishes: Known for their rich color and durability, oil-based finishes take longer to dry and have a stronger odor during application. They can add warmth to the wood but may yellow with age.
Understanding Hardwax Oil Finishes
Hardwax oil finishes combine the benefits of both oil and wax, providing a natural look while offering good protection. They are easy to maintain and can be spot-repaired, making them a great choice for busy households.
Choosing the Right Finish for Your Home
When selecting a finish, consider the following:
- Traffic Level: High-traffic areas may require more durable finishes like polyurethane.
- Desired Look: Decide if you prefer a matte, satin, or glossy finish.
- Environmental Impact: Opt for eco-friendly finishes if sustainability is a priority.
By consulting with a local flooring professional, you can ensure that you choose the best finish tailored to your specific needs and preferences.
| Finish Type | Durability | Drying Time | VOC Levels |
|---|---|---|---|
| Water-Based | Moderate | Fast | Low |
| Oil-Based | High | Slow | High |
| Hardwax Oil | Moderate | Moderate | Low |
Preparing Your Home for Floor Refinishing
Refinishing your floors can breathe new life into your home, but proper preparation is essential for a successful outcome. Here’s how to get your space ready:
Clearing the Room
- [[[Remove all furniture](https://www.familyhandyman.com/project/how-to-refinish-hardwood-floors/?srsltid=AfmBOooMMoFVB03kA6xWxRELqb74oGM7B_kNwgzgKP7_n0uE0gAVS_g6)](https://www.familyhandyman.com/project/how-to-refinish-hardwood-floors/?srsltid=AfmBOoqop6ntdbpzqz0gwWmZn15-2z36I-szHQ5Q-F33l-D4jL1vGXW5)](https://www.familyhandyman.com/project/how-to-refinish-hardwood-floors/?srsltid=AfmBOooTiIZIFWDmSeROkrCC2HRVj1M34IXtpDpi-cAoRQetvaaMtddL) from the room. This includes sofas, tables, and any other items that may obstruct the refinishing process.
- Pull the quarter round from the baseboard to allow for sanding right up to the edges. This step ensures a clean finish without any gaps.
- Cover vents and electrical boxes with painter’s tape to prevent dust from entering.
Protecting Your Belongings
- Use plastic sheeting to cover any items that cannot be moved. This will protect them from dust and debris.
- Consider using drop cloths to shield floors in adjacent rooms from dust and scratches.
- If refinishing only one room, seal doors with plastic sheeting to contain dust.
Ensuring Proper Ventilation
- Open windows and doors to allow fresh air to circulate. This is especially important when using products that emit fumes.
- Use fans to help with airflow, ensuring a comfortable working environment.
Proper preparation is key to achieving a professional-looking finish. Skipping these steps can lead to adhesion issues and an uneven appearance in the final coat.
By following these steps, you’ll set the stage for a successful floor refinishing project, ensuring your home looks stunning after the makeover!
Step-by-Step Guide to Sanding and Refinishing
Refinishing your hardwood floors can breathe new life into your home. Here’s a straightforward guide to help you through the process.
Equipment and Materials Needed
To get started, gather the following tools and materials:
- Drum sander or belt sander
- Edge sander for corners
- Various grits of sandpaper (40, 60, 80, and 120-grit)
- Wood filler for repairs
- Tack cloths for dust removal
- Polyurethane finish (oil-based or water-based)
Sanding Techniques for Best Results
- Prep the Room: Remove all furniture and cover vents to prevent dust from spreading. Seal doors with plastic sheeting if refinishing one room.
- Inspect and Repair: Check for any cracks or holes. Use wood filler to patch these areas and let it dry completely.
- Start Sanding: Begin with coarse grit sandpaper (40-grit) to remove the old finish. Always sand in the direction of the wood grain. Gradually move to finer grits (60, 80, and finally 120) for a smooth finish.
- Clean Between Stages: After each sanding stage, vacuum and wipe the floor with a tack cloth to remove dust.
Applying Stain and Finish
- Staining (Optional): If you want to change the color, apply a wood stain after sanding. Test a small area first to ensure you like the color.
- Applying Finish: Once the stain is dry, apply a polyurethane finish. Use a clean applicator and apply in thin, even coats. Remember to overlap each stroke by one-third to avoid streaks.
Proper preparation and attention to detail are key to achieving a stunning finish. Take your time and enjoy the process!
The Art of Screening and Recoating
Screening and recoating is a fantastic way to refresh your hardwood floors without the hassle of full sanding. This method involves lightly scuffing the top layer of finish and applying a new coat of polyurethane. It’s a quick and effective solution for minor wear and scratches.
When to Choose Screening Over Sanding
- Condition of the Floor: If your floors have only minor scratches and a dull finish, screening is ideal.
- Time and Cost: Screening is less time-consuming and more cost-effective than full sanding.
- Desired Outcome: If you want to maintain the wood’s natural look while enhancing its shine, screening is the way to go.
Tools Required for Screening
- Floor Sander: A drum or orbital sander is essential for the screening process.
- Sanding Screens: Use 120-grit screens for effective scuffing.
- Vacuum: A shop vacuum is necessary to clean up dust and debris after screening.
Applying a New Coat of Finish
- Preparation: Ensure the floor is clean and free of dust before applying the new finish.
- Application: Use a roller or applicator pad to apply the polyurethane evenly.
- Drying Time: Allow the first coat to dry completely before applying a second coat for added durability.
Remember, regular maintenance can extend the life of your floors. Screening and recoating every few years can keep them looking fresh and beautiful!
Maintaining Your Newly Refinished Floors
Once your hardwood floors have been beautifully refinished, it’s essential to keep them looking great for years to come. Here are some key tips to help you maintain your floors effectively:
Daily Cleaning Tips
- Sweep or vacuum regularly to remove dirt and debris that can scratch the surface.
- Use a damp mop with a mild cleaner specifically designed for hardwood floors.
- Avoid excessive water, as it can damage the wood.
Long-Term Maintenance Strategies
- Recoat your floors every 3-5 years to maintain their protective finish. This is crucial for keeping your floors looking fresh and vibrant.
- Inspect for scratches and dents regularly. For minor scratches, use a touch-up kit to blend them in.
- Use area rugs in high-traffic areas to protect your floors from wear and tear.
Dealing with Scratches and Dents
- For deeper scratches, lightly sand the area and reapply a thin coat of finish.
- Always use felt pads under furniture legs to prevent scratches.
- If you notice significant damage, consider hiring a professional to assess and repair the floors.
Remember, regular maintenance can significantly extend the life of your hardwood floors, keeping them beautiful for years to come.
Cost Considerations for Floor Refinishing
Refinishing your hardwood floors can be a great investment, but understanding the costs involved is essential. Here’s a breakdown of what to expect:
Budgeting for Your Project
- Average Cost: The national average for refinishing hardwood floors is around $1,883, with typical costs ranging from $1,101 to $2,666.
- Per Square Foot: Expect to pay between $8 and $12 per square foot for refinishing services.
- Labor Costs: Labor can cost between $2 and $8 per square foot, depending on your location and the complexity of the job.
Cost-Effective Refinishing Options
- DIY Refinishing: If you’re handy, consider doing it yourself. This can save you money, but be cautious of potential mistakes that could lead to higher costs later.
- Local Flooring Refinishers: Hiring local flooring refinishers can often provide competitive pricing and quality work.
- Screening and Recoating: This method is less invasive and can be more affordable than full sanding and refinishing.
Hiring a Professional vs. DIY
- Pros of Hiring Professionals: They have the experience and tools to do the job right, reducing the risk of costly errors.
- DIY Pros: You can save on labor costs, but ensure you have the right tools and knowledge to avoid mistakes.
Remember, investing in floor refinishing services not only enhances the beauty of your home but can also increase its value significantly. A well-refinished floor can yield a return on investment that often exceeds 100%.
Exploring Eco-Friendly Refinishing Options

Benefits of Eco-Friendly Products
Choosing eco-friendly refinishing options not only helps the environment but also enhances the beauty of your home. Using sustainable materials can significantly reduce your carbon footprint. Here are some benefits of opting for eco-friendly refinishing:
- Healthier Indoor Air Quality: Low-VOC finishes emit fewer harmful chemicals, making your home safer for your family.
- Sustainable Sourcing: Many eco-friendly products use wood from responsibly managed forests, promoting sustainability.
- Durability: Eco-friendly finishes often provide excellent protection, ensuring your floors last longer.
Top Eco-Friendly Floor Finishes
When selecting a finish, consider these eco-friendly options:
- Water-Based Finishes: These emit fewer volatile organic compounds (VOCs) compared to oil-based finishes, making them a safer choice for homes.
- Hardwax Oil Finishes: These provide a natural look while protecting the wood, allowing it to breathe and maintain its beauty.
- Reclaimed Wood: Using reclaimed wood not only adds character to your home but also reduces waste and promotes sustainability.
How to Choose Sustainable Materials
When selecting materials for your refinishing project, keep these tips in mind:
- Look for certifications like FSC (Forest Stewardship Council) to ensure sustainable sourcing.
- Choose products with low or no VOCs to improve indoor air quality.
- Consider local suppliers to reduce transportation emissions and support your community.
Embracing eco-friendly refinishing options can transform your home into a stylish and sustainable haven, ensuring that your floors not only look good but also contribute positively to the environment.
Troubleshooting Common Refinishing Issues

When refinishing your floors, you may encounter some common problems. Here’s how to tackle them effectively.
Addressing Uneven Finishes
Uneven finishes can occur due to improper application or inconsistent sanding. To fix this:
- Identify the areas with unevenness.
- Sand down the high spots gently.
- Reapply the finish evenly, ensuring a smooth coat.
Fixing Stain Discoloration
Stain discoloration can happen if the wood absorbs the stain unevenly. Here’s what to do:
- Sand the affected area lightly to remove the stain.
- Test the stain on a small, inconspicuous area first.
- Reapply the stain evenly, ensuring consistent application.
Preventing Future Problems
To avoid issues in the future, consider these tips:
- Use high-quality materials for staining and finishing.
- Follow the manufacturer’s instructions carefully.
- Maintain your floors regularly to prevent wear and tear.
Remember, patience and attention to detail are key to achieving a flawless finish. Taking the time to address these issues will ensure your floors look stunning for years to come.
By following these steps, you can effectively troubleshoot common refinishing issues and maintain the beauty of your hardwood floors. If problems persist, it may be wise to consult with a professional for expert advice and assistance.
If you’re facing issues with your refinishing project, don’t worry! Many common problems can be easily fixed. For expert help and solutions, visit our website today. Let us guide you through the process and ensure your floors look their best!
Final Thoughts on Floor Refinishing
In conclusion, refinishing your hardwood floors can truly transform your home, making it look fresh and inviting. Whether you choose to do it yourself or hire a professional, the key is to follow the right steps and use quality materials. Remember, taking care of your floors not only enhances their beauty but also extends their life. If you’re ready to give your floors a new look, consider the techniques we’ve discussed. With a little effort, you can achieve stunning results that will impress anyone who walks through your door. Happy refinishing!
Frequently Asked Questions
How can I restore the look of my hardwood floors?
Refinishing your hardwood floors is the best way to bring back their original beauty. This process removes the worn top layer and applies a new finish, making your floors look fresh and shiny again.
Is it cheaper to refinish hardwood floors or replace them?
Generally, refinishing is less expensive than replacing hardwood floors. If your floors are still in good shape, refinishing can save you money while improving their appearance.
How often should I refinish my hardwood floors?
With proper care, hardwood floors can be refinished every 7 to 10 years. However, if they show signs of wear, scratches, or discoloration, it may be time to refinish sooner.
Can all hardwood floors be refinished?
Most hardwood floors can be refinished unless they are severely damaged or have been refinished too many times. If the wood is warped or has deep damage, replacement might be necessary.
What is the best way to maintain my refinished floors?
To keep your refinished floors looking great, sweep or vacuum regularly and use a damp mop for deeper cleaning. Avoid harsh cleaners and always use furniture pads to prevent scratches.
How long does the refinishing process take?
The entire process can take a few days, depending on the size of the area and the methods used. Allow time for drying between coats of finish.
What type of finish should I use for my hardwood floors?
You can choose between water-based and oil-based finishes. Water-based finishes dry faster and have less odor, while oil-based finishes provide a richer color but take longer to dry.
What should I do if my floors have scratches or dents?
Minor scratches can often be buffed out, while deeper dents may require sanding and refinishing that area. For severe damage, you might need to replace the affected boards.


