Refinishing your floors can breathe new life into your home, making it look fresh and inviting. Whether you have hardwood, engineered wood, or another type of flooring, understanding the basics of floor refinishing is essential. This guide will walk you through everything you need to know, from preparation to application and maintenance, ensuring your floors shine for years to come.
Thank you for reading this post, don't forget to subscribe!Key Takeaways
- Floor refinishing restores the beauty of your floors and can increase your home’s value.
- Preparation is key: clean, repair, and choose the right tools before starting.
- Choosing between water-based and oil-based finishes depends on your needs and preferences.
- Sanding is crucial for a smooth surface; always sand in the direction of the wood grain.
- Regular maintenance, like cleaning and reapplying finish, keeps your floors looking great.
Understanding Floor Refinishing Basics

What is Floor Refinishing?
Floor refinishing is the process of restoring the surface of wood floors to enhance their appearance and durability. This involves sanding down the existing finish and applying a new coat to protect the wood. Refinishing can breathe new life into tired floors, making them look brand new.
Benefits of Refinishing Your Floors
Refinishing your floors offers several advantages:
- Improved Aesthetics: A fresh finish can make your floors look stunning.
- Increased Durability: New finishes protect against wear and tear.
- Cost-Effective: Refinishing is often cheaper than replacing floors.
Common Types of Floor Finishes
There are various finishes available for wood floors, including:
- Oil-Based Polyurethane: Known for its durability and rich color.
- Water-Based Polyurethane: Dries quickly and has less odor.
- Eco-Friendly Options: These finishes are safer for the environment and your home.
By understanding the basics of floor refinishing, you can make informed decisions about your flooring needs. Whether you choose to hire local flooring refinishers or tackle the project yourself, knowing what to expect is key to a successful outcome.
Preparing Your Space for Floor Refinishing
Before diving into the refinishing process, it’s essential to prepare your space properly. This preparation not only ensures a smoother workflow but also enhances the final results of your refinishing project.
Clearing and Cleaning the Area
Start by removing all furniture and items from the room. This includes rugs, curtains, and any other belongings that could obstruct your work. Once the space is clear, thoroughly clean the floor to remove dust and debris. This step is crucial for achieving a flawless finish.
- Remove all furniture and rugs.
- Sweep or vacuum the entire area.
- Wipe down surfaces to eliminate dust.
Repairing Floor Imperfections
Next, inspect your floor for any damages. Look for scratches, dents, or gaps that need attention. Addressing these imperfections before sanding is vital. Use wood filler for small holes and a patching compound for larger areas. Allow the repairs to dry completely before proceeding.
- Fill in cracks and holes with wood filler.
- Sand down any rough spots.
- Ensure the surface is smooth and even.
Choosing the Right Tools and Materials
Having the right tools is essential for a successful refinishing project. Gather the necessary equipment before you start:
- Sanding Equipment: Drum sander, edger, and hand sanders.
- Safety Gear: Dust mask, safety glasses, and ear protection.
- Cleaning Supplies: Vacuum, tack cloths, and cleaning solutions.
Proper preparation is key to achieving a stunning finish. By taking the time to clear, clean, and repair your space, you set the stage for a successful refinishing project.
Choosing the Right Finish for Your Floors

Water-Based vs. Oil-Based Finishes
When selecting a finish for your floors, you have two main options: water-based and oil-based finishes. Water-based finishes dry quickly and are less toxic, making them a popular choice for homeowners. They maintain the natural color of the wood without yellowing over time. On the other hand, oil-based finishes provide a rich, warm hue and are more durable, but they take longer to dry and emit stronger fumes.
| Feature | Water-Based Finishes | Oil-Based Finishes |
|---|---|---|
| Drying Time | Fast (1-2 hours) | Slow (6-8 hours) |
| Toxicity | Low | High |
| Color Retention | Excellent | Moderate |
Understanding Polyurethane Finishes
Polyurethane is a common choice for floor finishes due to its durability. It comes in both water-based and oil-based forms, each with its own benefits. Water-based polyurethane is ideal for a clear finish that highlights the wood’s natural beauty, while oil-based polyurethane offers a more robust protective layer.
Eco-Friendly Finish Options
In today’s environmentally conscious world, many homeowners are looking for eco-friendly options. Water-based finishes are generally more sustainable, emitting fewer volatile organic compounds (VOCs). Additionally, there are natural oils and waxes available that provide a beautiful finish without harmful chemicals.
Choosing the right finish is essential for enhancing the beauty and durability of your floors. Consider your lifestyle, the room’s function, and your aesthetic preferences to make the best choice for your home.
Step-by-Step Guide to Sanding Your Floors
Selecting the Right Sanding Equipment
Choosing the right tools is essential for a successful sanding process. Here are the key tools you’ll need:
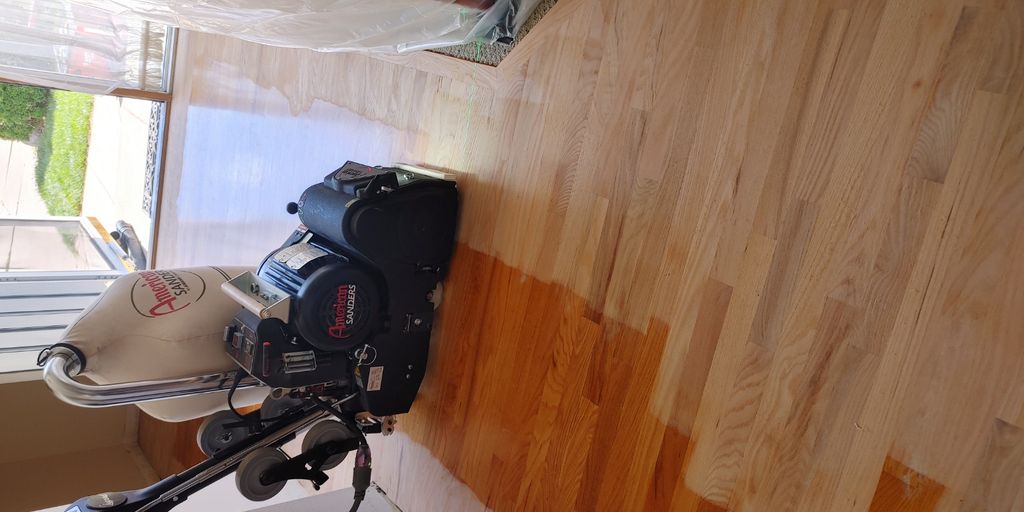
- Drum Sander: Ideal for large areas, it effectively removes old finishes and smooths imperfections.
- Edging Sander: Perfect for corners and edges where the drum sander can’t reach.
- Hand Sanders: Useful for tight spaces and detailed work.
Sanding Techniques for a Smooth Finish
To achieve a flawless surface, follow these steps:
- Start with Coarse Grit: Use 36-40 grit sandpaper to strip away the old finish. Move diagonally across the floor, overlapping each pass slightly.
- Transition to Medium Grit: Switch to 60-80 grit to refine the surface and remove scratches left by the coarse grit.
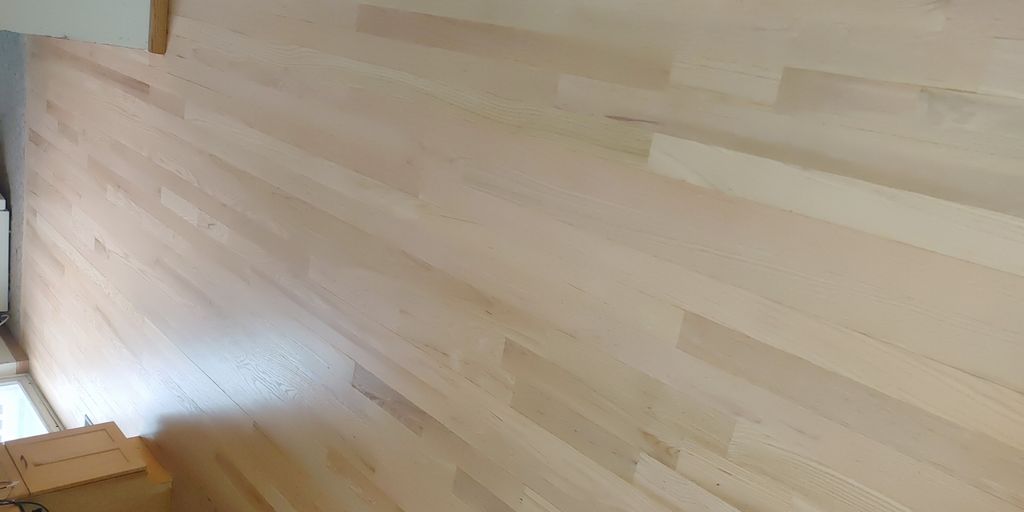
- Finish with Fine Grit: Use 100-120 grit for a polished look, ensuring you sand in the direction of the wood grain.
Safety Precautions During Sanding
Safety is paramount when sanding your floors. Here are some tips to keep in mind:
- Wear Protective Gear: Use a mask, goggles, and ear protection to safeguard against dust and noise.
- Ensure Proper Ventilation: Open windows and doors to allow fresh air to circulate.
- Keep the Area Clean: Regularly vacuum to remove dust and debris, preventing it from interfering with the sanding process.
Proper sanding is crucial for achieving a stunning finish. By following these steps and precautions, you’ll ensure your floors are beautifully prepared for their new look. Remember, patience and attention to detail will yield the best results!
Applying the Finish: Techniques and Tips
Using Brushes and Rollers
When applying the finish, using the right tools is essential. Brushes and rollers can help achieve a smooth and even coat. Here are some tips:
- Choose the right applicator: A lamb’s wool applicator is great for large areas, while a fine-bristled brush is perfect for edges and corners.
- Work in sections: Apply the finish in small sections to maintain a wet edge and avoid lap marks.
- Follow the grain: Always apply the finish in the direction of the wood grain for the best results.
Avoiding Common Application Mistakes
To ensure a flawless finish, be mindful of these common pitfalls:
- Skipping sanding between coats: This can lead to a rough finish.
- Applying too thick a coat: Thick layers can cause bubbles and uneven drying.
- Neglecting safety precautions: Always wear protective gear to avoid inhaling fumes.
Drying and Curing Times
Understanding drying and curing times is crucial for a successful finish:
- First coat drying: Allow the first coat to dry completely, which can take several hours.
- Additional coats: Apply 2-3 more coats, sanding lightly between each one. Avoid applying more than two coats in one day.
- Final drying: Let the final coat dry completely before using the floor. Full curing can take up to a week, but light use is usually possible after 24-48 hours.
Proper application and drying times are crucial for a durable and beautiful finish. Patience and attention to detail will ensure the best results.
By following these techniques and tips, you can achieve a stunning finish that enhances the beauty of your floors and stands the test of time.
Advanced Techniques for a Professional Finish
Achieving a professional finish on your floors requires more than just basic application techniques. Here are some advanced methods to elevate your refinishing project:
Tinting and Staining Options
- Choose the Right Stain: Select a stain that complements your wood type and desired aesthetic. Consider testing on a small area first.
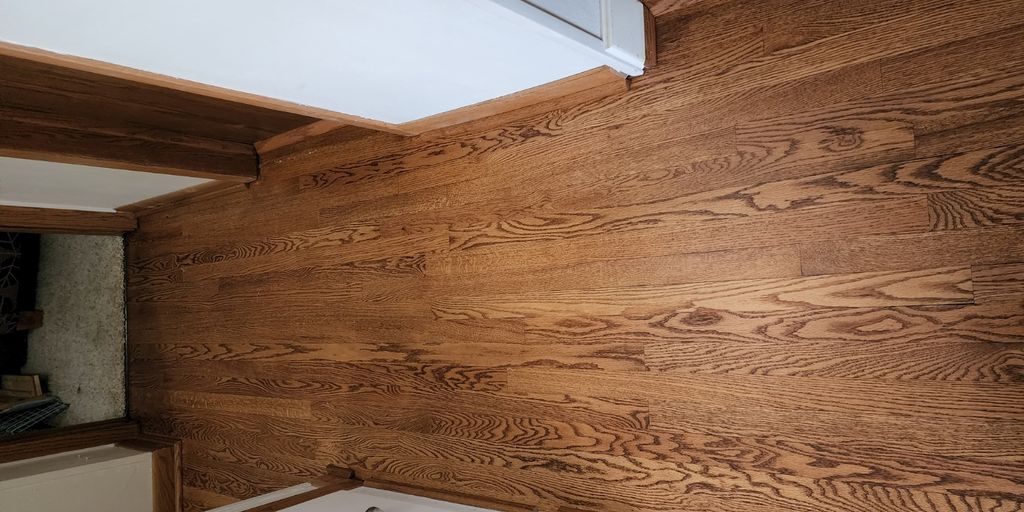
- Layering for Depth: Apply multiple layers of stain to achieve a richer color. Allow each layer to dry completely before applying the next.
- Mixing Stains: For a unique look, mix different stains to create a custom color that suits your style.
Layering Multiple Coats
- Apply Thin Coats: Instead of one thick coat, apply several thin coats of finish. This helps prevent bubbles and ensures a smoother surface.
- Sanding Between Coats: Lightly sand between each coat with fine-grit sandpaper (220-grit) to enhance adhesion and smoothness.
- Follow Drying Times: Allow adequate drying time between coats to ensure a durable finish. Typically, 24 hours is recommended.
Buffing and Polishing for Shine
- Use a Buffer: After the final coat has cured, use a floor buffer to achieve a high-gloss finish. This step enhances the overall appearance and durability of the floor.
- Polishing Compounds: Consider using polishing compounds designed for wood floors to add extra shine and protection.
- Regular Maintenance: Keep your floors looking their best by regularly cleaning and polishing them to maintain their shine.
Mastering these advanced techniques can help you achieve a finish that rivals professional results, enhancing the beauty and longevity of your floors.
Maintaining Your Newly Refinished Floors
Once you’ve put in the effort to refinish your hardwood floors, keeping them in great shape is essential. Regular maintenance can extend the life of your floors and keep them looking new. Here are some practical tips to help you maintain your floors effectively:
Regular Cleaning Tips
- Sweep or Vacuum Regularly: Dust and dirt can scratch your floors. Use a soft-bristle broom or a vacuum with a hardwood setting to remove debris daily.
- Mop with Care: Use a damp mop with a cleaner specifically designed for hardwood floors. Avoid soaking the mop; too much water can damage the wood. A mix of 10 parts water to 1 part white vinegar works well, but be sure to dry the floor immediately after mopping.
- Tackle Spills Immediately: Wipe up spills right away to prevent water damage. Use a soft, absorbent cloth to blot the liquid.
Long-Term Maintenance Strategies
- Scratch Prevention: Place felt pads under furniture legs to prevent scratches. Avoid walking on hardwood floors with high heels, which can cause dents.
- Sunlight Protection: Sunlight can discolor your floors over time. Use curtains or blinds to block direct sunlight. You can also rearrange rugs and furniture periodically to ensure even exposure.
- Humidity Control: Wood expands and contracts with humidity changes. Keep indoor humidity levels between 30% and 50% to prevent your floors from warping or cracking. A humidifier or dehumidifier can help maintain these levels.
- Recoating Schedule: Depending on foot traffic and wear, you may need to recoat your floors every 3-5 years. Lightly sand the floor and apply a fresh coat of polyurethane to keep the finish strong and beautiful.
- Deep Cleaning: For a deeper clean, consider using a professional hardwood floor cleaner once a year. This will remove any buildup that regular cleaning might miss.
By following these simple tips, you can maintain the beauty and durability of your refinished hardwood floors for years to come. Remember, the effort you invest in maintenance will pay off in the long run, keeping your floors looking stunning and functional.
Troubleshooting Common Refinishing Problems
Refinishing your floors can be a rewarding project, but sometimes things don’t go as planned. Here’s how to tackle common issues that may arise during the process.
Dealing with Bubbles and Streaks
Bubbles and streaks can ruin the appearance of your newly refinished floors. To avoid this:
- Ensure the surface is clean and dry before applying the finish.
- Use a high-quality applicator to apply the finish evenly.
- Avoid over-brushing, which can introduce air bubbles.
Fixing Uneven Finish
An uneven finish can be frustrating. Here’s how to fix it:
- Identify the areas with unevenness.
- Lightly sand the affected areas with fine-grit sandpaper.
- Clean the dust and reapply the finish, ensuring even coverage.
Preventing Future Issues
To keep your floors looking great:
- Regularly clean your floors to prevent dirt buildup.
- Use furniture pads to avoid scratches.
- Reapply finish as needed to maintain protection.
Remember, proper preparation and application are key to achieving a flawless finish. Taking the time to address these common issues will ensure your floors remain beautiful for years to come.
Hiring a Professional vs. DIY Floor Refinishing
When it comes to refinishing your floors, you have two main options: doing it yourself (DIY) or hiring a professional. Each choice has its own set of advantages and challenges.
Cost Considerations
- DIY: You can save money on labor costs, but you’ll need to invest in tools and materials. Expect to spend between $600 and $1,000 for a DIY project covering about 275 sq. ft.
- Professional: Hiring a Local Hardwood Flooring Services can cost between $1,150 and $2,500, depending on the size and condition of your floors. This includes labor, materials, and cleanup.
Time and Effort Involved
- DIY: Refinishing your floors can be time-consuming, especially if you’re learning as you go. It may take several days to complete the project.
- Professional: A Local flooring Professional can complete the job more quickly and efficiently, often within 3 to 7 days.
Quality of Work
- DIY: While you have creative control, mistakes can lead to uneven finishes or damage. Proper technique is crucial.
- Professional: Experts use industrial-grade equipment and have the experience to achieve a flawless finish. Their work often comes with guarantees, providing peace of mind.
Ultimately, the choice between DIY and hiring a professional depends on your budget, skill level, and the specific needs of your floors. Consider the condition of your floors and the type of finish you desire before making a decision.
Exploring Creative Floor Refinishing Ideas
Refinishing your floors is not just about restoring their original beauty; it’s also an opportunity to express your style and creativity. Here are some innovative ideas to consider:
Incorporating Patterns and Designs
- Use painter’s tape to create geometric patterns or stripes on your floors. This can add a modern touch to any room.
- Stencils can be used to apply intricate designs, giving your floors a unique flair.
- Consider parquet patterns by mixing different types of wood or stains to create a dramatic contrast that adds depth and dimension to your flooring.
Using Stencils and Tape
- Stencils allow for detailed designs that can transform a simple floor into a work of art. Choose designs that complement your home’s decor.
- Painter’s tape can help you achieve clean lines and sharp edges, making it easier to create complex patterns without the mess.
Combining Different Finishes
- Experiment with different finishes to create a layered look. For example, you can use a matte finish in some areas and a glossy finish in others to highlight specific sections of your floor.
- Tinting and staining options can also enhance the natural beauty of the wood while adding a personal touch.
Remember, the key to a successful refinishing project is preparation. Take the time to plan your design and gather the right materials to ensure a stunning result.
With these creative ideas, you can truly transform your space and make your floors a standout feature in your home. Whether you choose to go bold with colors or keep it subtle with textures, the possibilities are endless!
Understanding Different Types of Wood Floors

When it comes to wood flooring, not all options are the same. Each type has its own unique features and benefits, making it essential to understand the differences before starting your refinishing project.
Hardwood vs. Engineered Wood
Hardwood floors are made from solid wood and are known for their durability and classic appeal. They can be sanded and refinished multiple times, making them a long-lasting investment in your home. On the other hand, engineered wood consists of a top layer of real hardwood bonded to layers of plywood. This construction makes engineered wood more stable in varying temperatures and humidity levels, offering a practical alternative at a lower cost.
Characteristics of Various Wood Species
Different wood species offer distinct characteristics:
- Oak: Known for its strength and versatility, oak is a popular choice for many homes.
- Maple: This wood is durable and ideal for high-traffic areas due to its hardness.
- Exotic Woods: Options like teak and mahogany provide unique aesthetics and can add value to your home.
Choosing the Best Wood for Your Space
When selecting wood flooring, consider the following:
- Durability: Choose a wood species that can withstand your household’s activity level.
- Aesthetic Appeal: Think about the color and grain patterns that will complement your home’s decor.
- Maintenance Needs: Some woods require more upkeep than others, so factor in your willingness to maintain them.
Understanding the differences between hardwood and engineered wood can help you make an informed decision that enhances your home’s beauty and value.
When it comes to choosing the right wood floor for your home, understanding the different types available is key. From classic hardwood to modern laminate, each option has its own unique benefits. Ready to find the perfect flooring for your space? Visit our website today to explore our services and get started!
Final Thoughts on Floor Refinishing
Refinishing your floors can truly change the look of your home, making it feel fresh and inviting. With the right tools and techniques, you can achieve amazing results on your own. However, if you prefer a hassle-free experience, consider hiring professionals who can ensure a perfect finish. Remember, whether you choose to do it yourself or seek help, restoring your floors is a rewarding project that adds beauty and value to your space. So, roll up your sleeves and get started on your floor refinishing journey today!
Frequently Asked Questions
What does it mean to refinish a floor?
Refinishing a floor means removing the old finish and applying a new one to make it look fresh and beautiful again.
Why should I refinish my floors?
Refinishing your floors can restore their shine, remove scratches, and make your home look nicer without needing to replace them.
What types of finishes are available for floors?
There are several types of finishes, including water-based, oil-based, and eco-friendly options that can enhance the look of your floors.
How do I prepare my floors for refinishing?
To prepare, you should clean the area, fix any damage, and gather the right tools and materials.
What is the best way to sand my floors?
Use a drum sander or an orbital sander, starting with coarse grit sandpaper and moving to finer grits for a smooth finish.
How do I apply the finish to my floors?
You can apply the finish using a brush, roller, or applicator, making sure to follow the wood grain and avoid bubbles.
How can I maintain my newly refinished floors?
Regularly sweep or vacuum, clean up spills quickly, and reapply finish as needed to keep your floors looking great.
When should I hire a professional for floor refinishing?
If your floors are heavily damaged or you’re unsure about the refinishing process, hiring a professional can ensure the best results.


