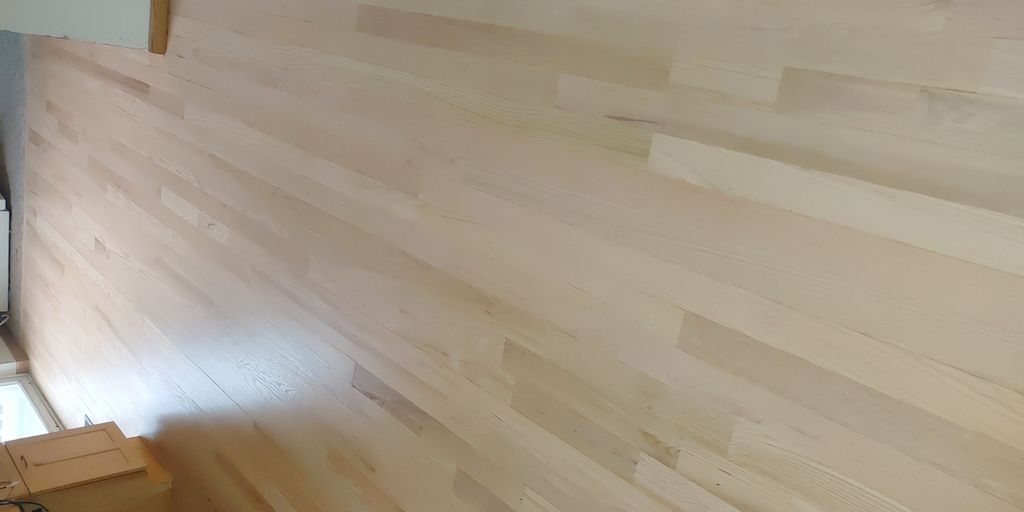
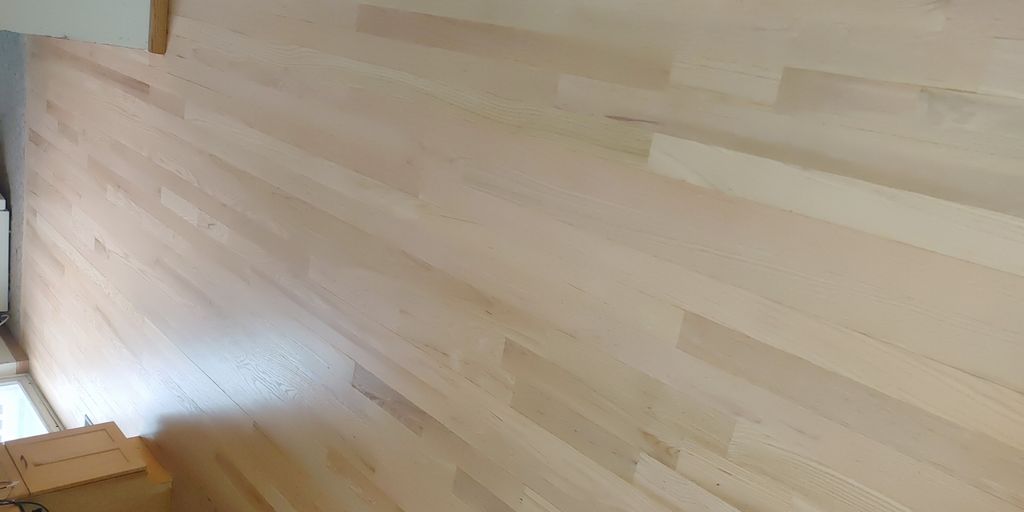
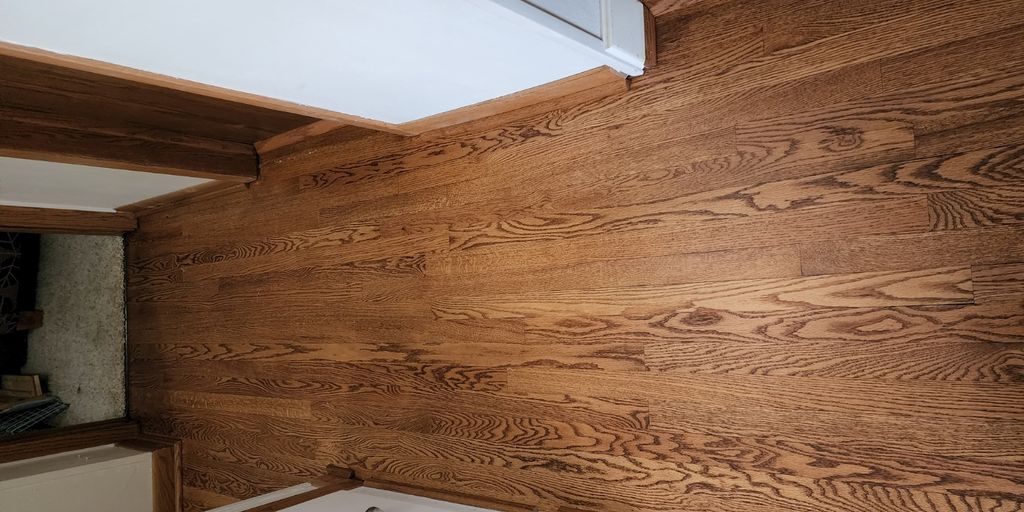
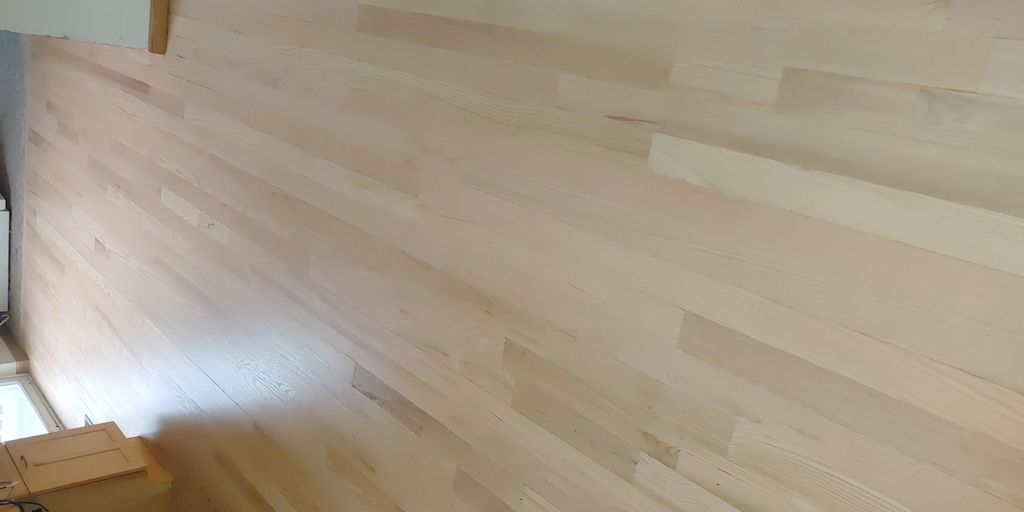
Reviving hardwood floors can breathe new life into your home, making them shine like new. This guide provides essential tips and techniques for restoring the beauty of your hardwood floors, ensuring they remain a stunning feature in your living space. From understanding the causes of dullness to applying the perfect finish, you will learn everything you need to know for a successful hardwood floor revival.
Thank you for reading this post, don't forget to subscribe!Key Takeaways
- Regular cleaning is essential to keep hardwood floors looking their best.
- Proper preparation, including sanding and filling cracks, is crucial before applying any finish.
- Choosing the right type of polyurethane can affect the durability and appearance of your floors.
- Applying multiple thin coats of finish is better than one thick coat to avoid bubbles and drips.
- Routine maintenance, including polishing and addressing scratches, will help maintain the shine of your floors.
Understanding the Basics of Hardwood Floor Revival
Hardwood floors can lose their shine over time, but with the right knowledge, you can bring them back to life. Understanding the causes of dullness is the first step in reviving your floors.
What Causes Hardwood Floors to Dull?
Several factors contribute to the dull appearance of hardwood floors:
- Foot Traffic: Constant movement can wear down the finish.
- Sunlight Exposure: UV rays can fade the wood’s color.
- Dirt and Grit: These can act like sandpaper, scratching the surface.
The Importance of Regular Maintenance
Regular maintenance is crucial for keeping your hardwood floors looking their best. Here are some key practices:
- Sweep or Vacuum: Remove dirt and debris regularly.
- Use pH-Neutral Cleaners: Avoid harsh chemicals that can damage the finish.
- Refinish Periodically: This helps restore the floor’s protective layer and shine.
Common Mistakes to Avoid
To maintain the beauty of your hardwood floors, steer clear of these common pitfalls:
- Using Excessive Water: Too much moisture can warp the wood.
- Neglecting to Clean Spills: Immediate cleanup prevents stains.
- Skipping Regular Maintenance: Consistent care is key to longevity.
Keeping your hardwood floors in top shape not only enhances their beauty but also protects your investment for years to come.
By understanding these basics, you can ensure your hardwood floors remain a stunning feature of your home.
Preparing Your Hardwood Floors for Refinishing
Before diving into the refinishing process, it’s crucial to prepare your hardwood floors properly. This ensures a smooth and durable finish that will last for years. Here are the essential steps to follow:
Cleaning and Inspecting the Surface
Start by thoroughly cleaning the floor. Remove all dirt, dust, and debris using a vacuum or broom. For optimal results, consider using a specialized cleaner. This step is crucial for ensuring that the new coating adheres properly. After cleaning, inspect the floor for any protruding nails or staples and secure them. Look for imperfections such as dents, scratches, or gaps between floorboards, and address these issues before proceeding.
Sanding Techniques for a Smooth Finish
Sanding is a vital step in preparing your hardwood floors. It smooths the surface and removes any existing finishes, allowing the wood to absorb the polyurethane effectively. Here’s how to sand your floors:
- Use coarse-grit sandpaper to remove old finishes or paint layers.
- Progress to finer-grit sandpapers for a smooth finish.
- Always sand parallel to the wood grain to avoid scratches.
- After sanding, use a vacuum or tack cloth to remove any dust particles.
Filling Gaps and Cracks
After sanding, check for any gaps or cracks in the floor. Use a wood filler that matches the color of your hardwood to fill these imperfections. This step is important for achieving a uniform finish. Once the filler is dry, sand the filled areas lightly to ensure they are level with the surrounding wood.
Proper preparation is key to achieving a professional-looking finish. Skipping these steps can lead to adhesion issues and an uneven appearance in the final coat.
By following these steps, you can ensure that your hardwood floors are ready for refinishing, setting the stage for a beautiful and lasting finish. If you’re unsure about the process, consider reaching out to Local Hardwood Flooring Services for expert assistance.
Choosing the Right Products for Your Floors
Selecting the right products for your hardwood floors is essential for maintaining their beauty and durability. Here’s what you need to know:
Oil-Based vs. Water-Based Polyurethane
- Oil-based polyurethane provides a rich, warm finish but takes longer to dry and has a stronger odor.
- Water-based polyurethane dries quickly, has low odor, and maintains the wood’s natural color without yellowing over time.
| Feature | Oil-Based Polyurethane | Water-Based Polyurethane |
|---|---|---|
| Drying Time | 8-12 hours | 2-4 hours |
| Odor | Strong | Low |
| Color Retention | Yellowing over time | Clear |
| Durability | High | Moderate |
Selecting the Best Stain for Your Wood Type
- Choose a stain that complements your wood species. For example, lighter woods like maple may benefit from a light stain to enhance their natural beauty, while darker woods like walnut can handle deeper, richer tones.
- Always test the stain on a small, inconspicuous area to see how it reacts with your wood.
Essential Tools and Materials Needed
To achieve a professional finish, gather these tools:
- Microfiber mop: For applying cleaners and polishes without scratching.
- Soft-bristled broom: To sweep away dust and debris.
- Quality hardwood cleaner: Specifically formulated to avoid damaging your floors.
- Polyurethane applicator: For even application of your finish.
Choosing the right products is crucial for the longevity of your hardwood floors. Consult a Local flooring Professional if you’re unsure about the best options for your specific needs.
By understanding the differences between products and selecting the right tools, you can ensure your hardwood floors remain stunning for years to come.
Step-by-Step Guide to Applying Polyurethane

Applying polyurethane to your hardwood floors can seem like a big task, but with the right steps, you can achieve a stunning finish. Here’s how to do it:
Preparing the Floor for Application
- Clean the Surface: Start by sweeping or vacuuming the floor to remove dust and debris. A clean surface is essential for a good finish.
- Inspect for Damage: Check for any cracks or imperfections. Fill these with wood filler and let it dry completely.
- Sand the Floor: Use sandpaper to smooth the surface. For floors in better condition, start with #120 grit and finish with #220 grit. This ensures the surface is smooth and ready for the polyurethane application.
Applying the First Coat
- Mix the Polyurethane: Stir the polyurethane gently to avoid bubbles. Pour a small amount into a separate container.
- Use the Right Applicator: A roller is great for large areas, while a brush is perfect for edges. Apply the polyurethane in long, even strokes, following the wood grain.
- Keep a Wet Edge: This helps avoid lap marks. Work in small sections to maintain a wet edge.
Intermediate Sanding Between Coats
- After the first coat dries, lightly sand the floor with #220 grit sandpaper. This helps the next coat adhere better.
- Clean the floor again to remove any dust before applying the next coat.
Final Coats and Curing
- Apply Additional Coats: Repeat the application process for 2-3 coats, sanding in between. Each coat builds durability and shine.
- Allow Proper Curing Time: After the final coat, let the floor cure for at least 24 hours before light use. Full curing can take up to a week.
Remember, patience and attention to detail are key to achieving a professional-looking finish on your hardwood floors. Following these steps will ensure a beautiful and long-lasting result.
Special Techniques for Different Wood Types

Handling Exotic Hardwoods
Exotic hardwoods, such as teak and Brazilian cherry, require special care due to their natural oils. Thorough cleaning is essential before applying any finish. Consider using a de-waxed shellac as a sealer to ensure better adhesion of the finish.
Application on Light vs. Dark Woods
When working with light woods like maple, opt for water-based polyurethane. This choice helps maintain the wood’s natural color without adding an amber tint. For dark woods, oil-based polyurethane enhances richness and warmth, making it a popular choice.
Dealing with Tannin Reactions
Certain woods, like oak, can react with finishes due to their tannin content. To prevent discoloration, apply a stain-blocking primer before finishing. This step is crucial for achieving a uniform look across the floor.
Understanding the unique properties of your wood type can significantly impact the final appearance and durability of your floors.
By following these specialized techniques, you can ensure that your hardwood floors not only look stunning but also stand the test of time.
Final Touches for a Gleaming Finish
Allowing Proper Curing Time
After applying the final coat of polyurethane, allowing enough curing time is crucial. Rushing this step can ruin your hard work. Generally, light foot traffic is okay after 24 hours, but full curing can take up to 7 days. During this time, avoid placing heavy furniture or rugs on the floor to ensure a perfect finish.
Buffing Techniques for a Lasting Shine
To achieve a stunning shine, buffing is essential. Here are some tips:
- Use a buffing machine with a 120-grit sanding screen for best results.
- Employ smooth techniques to avoid scratches.
- Always clean the floor thoroughly after buffing to remove any dust or debris.
Preventing Common Finish Issues
To keep your floors looking great, consider these preventive measures:
- Avoid applying finishes too thickly to prevent bubbling.
- Ensure proper drying conditions to avoid uneven sheen.
- Regularly inspect your floors for scratches or wear and address them promptly.
Remember, the final touches are what make your hardwood floors shine. Taking the time to properly cure, buff, and maintain your floors will ensure they look beautiful for years to come!
Maintaining Your Newly Finished Hardwood Floors
Keeping your hardwood floors looking their best requires consistent care and attention. Here are some essential tips to ensure your floors remain beautiful and durable:
Regular Cleaning Tips
- Sweep or vacuum regularly to remove dirt and grit that can scratch the surface.
- Use a damp mop with a pH-neutral cleaner designed for hardwood floors. Avoid excess water, as it can damage the wood.
- Wipe up spills immediately to prevent stains and water damage.
Preventing Scratches and Dents
- Place area rugs in high-traffic areas to protect against wear and tear.
- Use furniture pads under legs to prevent scratches when moving furniture.
- Avoid walking on hardwood floors with high heels or cleats, as they can cause dents.
Reapplication Guidelines
- Over time, the finish on your hardwood floors may wear down. It’s advisable to recoat every 3-5 years depending on foot traffic.
- When reapplying, ensure the surface is clean and lightly sanded to promote adhesion.
Proper maintenance not only enhances the beauty of your hardwood floors but also extends their lifespan, making it a worthwhile investment. Regular care is key!
Cost-Effectiveness of Refinishing vs. Replacing

When it comes to maintaining hardwood floors, homeowners often face the dilemma of whether to refinish or replace. Refinishing is generally more cost-effective than replacement, allowing you to restore the beauty of your floors without the hefty price tag of new materials.
Initial Investment vs. Long-Term Savings
- Refinishing costs typically range from $1,000 to $8,000, depending on the size and condition of the floors.
- In contrast, replacing hardwood can cost significantly more, especially when considering installation fees.
- Refinishing can yield an average return on investment (ROI) of about 147%, making it a smart financial choice.
| Option | Estimated Cost (per sq ft) | ROI (%) |
|---|---|---|
| Refinishing | $3 – $5 | 147% |
| Replacement | $8 – $12 | 100% |
Environmental Benefits of Refinishing
- Refinishing hardwood floors is an eco-friendly option, as it reduces waste and the need for new materials.
- It helps preserve the natural beauty of the wood, contributing to a sustainable home environment.
- Choosing to refinish instead of replace can significantly lower your carbon footprint.
In summary, refinishing your hardwood floors not only saves money but also benefits the environment. It’s a practical choice that enhances the beauty of your home while being mindful of costs and sustainability.
When to Consider Replacement
- If your floors are severely damaged or beyond repair, replacement may be necessary.
- Consider replacement if the wood is too thin to sand down or if there are extensive structural issues.
- Always weigh the costs and benefits before making a decision, as refinishing can often extend the life of your floors significantly.
Expert Tips for Long-Lasting Hardwood Floors
Keeping your hardwood floors looking their best requires a bit of effort and the right strategies. Here are some expert tips to help you maintain their beauty and durability:
Using Area Rugs and Furniture Pads
- Place area rugs in high-traffic areas to protect your floors from wear and tear.
- Use furniture pads under the legs of chairs and tables to prevent scratches when moving them.
- Regularly check and replace these pads to ensure they provide optimal protection.
Controlling Humidity Levels
- Maintain indoor humidity between 30% to 50% to prevent wood from expanding or contracting.
- Use a humidifier during dry seasons and a dehumidifier in humid conditions to keep levels stable.
- This helps avoid warping and keeps your floors looking great.
Choosing the Right Cleaning Products
- Opt for a pH-neutral cleaner specifically designed for hardwood floors.
- Avoid using harsh chemicals or excessive water, as they can damage the finish.
- Regularly dust and clean your floors to prevent dirt buildup, which can act like sandpaper and cause scratches.
Remember, regular maintenance is key to preserving the beauty of your hardwood floors. By following these tips, you can enjoy a gleaming finish for years to come!
Troubleshooting Common Refinishing Problems
Refinishing hardwood floors can sometimes lead to unexpected issues. Here’s how to tackle some common problems:
Addressing Uneven Stain Absorption
Uneven stain absorption can ruin the look of your floors. To fix this, ensure you:
- Test the stain on a small area first.
- Apply a pre-stain conditioner to help the wood absorb the stain evenly.
- Use a consistent application method to avoid streaks.
Fixing Bubbles and Drips
Bubbles and drips can occur during the application of polyurethane. To prevent this:
- Stir the polyurethane gently instead of shaking it to avoid air bubbles.
- Apply thin, even coats to minimize drips.
- Use a high-quality applicator to ensure a smooth finish.
Repairing Scratches and Imperfections
Scratches and imperfections can be frustrating. Here’s how to address them:
- Lightly sand the affected area with fine-grit sandpaper.
- Apply a matching wood filler to fill in deeper scratches.
- Reapply the finish to blend the repair with the surrounding area.
Remember, knowing how to address common issues like scratches, squeaks, gaps, and water damage can help maintain the integrity and beauty of your hardwood flooring.
By following these tips, you can ensure your refinishing project results in a beautiful, lasting finish.
Enhancing the Natural Beauty of Your Floors
Choosing the Right Polish
To keep your hardwood floors looking their best, selecting the right polish is essential. A good polish not only enhances shine but also protects the wood. Here are some options:
- Commercial Polishes: These are designed specifically for hardwood and can fill in minor scratches.
- DIY Solutions: You can create natural polishes using ingredients like olive oil and vinegar for a gentle shine.
- Avoid Harsh Chemicals: Stay away from products that can damage the finish or dull the wood.
DIY Natural Floor Shine Solutions
If you prefer a more natural approach, consider these DIY solutions:
- Olive Oil and Vinegar: Mix two tablespoons of olive oil with one tablespoon of vinegar and two cups of warm water. This solution can be sprayed onto a mop for a gentle clean.
- Black Tea: Brew two tea bags in two quarts of water. Once cooled, use this to mop your floors. The tannins in the tea help hide scratches.
- Lemon Juice and Oil: Combine two tablespoons of lemon juice with two tablespoons of olive oil and two cups of warm water for a refreshing shine.
Professional vs. DIY Refinishing
When it comes to refinishing, you have two main options:
- Professional Services: Hiring experts can ensure a flawless finish and save you time.
- DIY Refinishing: If you’re handy, you can tackle this project yourself, but be prepared for a time commitment and the need for proper tools.
Maintaining the natural beauty of your hardwood floors is not just about cleaning; it’s about using the right products and techniques to enhance their shine and longevity.
Final Thoughts
By following these tips, you can keep your hardwood floors looking stunning and well-maintained. Regular care and the right products will ensure your floors remain a beautiful feature of your home for years to come.
Want to make your floors shine and look their best? At Knox Hardwood Flooring, we specialize in enhancing the natural beauty of your floors with our top-notch services. Whether you need hardwood, laminate, or vinyl flooring, we have the perfect solution for you. Don’t wait any longer—visit our website today to learn more and schedule your consultation!
Final Thoughts on Reviving Your Hardwood Floors
In conclusion, bringing your hardwood floors back to life is not just about aesthetics; it’s about preserving the beauty and value of your home. By following the steps outlined in this article, you can achieve a stunning finish that will last for years. Remember to keep your floors clean, choose the right products, and apply finishes carefully. With a little effort and the right techniques, your hardwood floors can shine like new again. Don’t hesitate to reach out to professionals if you need assistance. Happy flooring!
Frequently Asked Questions
What causes hardwood floors to lose their shine?
Hardwood floors can look dull due to dirt, scratches, or wear from foot traffic over time.
How often should I clean my hardwood floors?
You should clean your hardwood floors regularly, ideally sweeping or vacuuming every week to keep them looking nice.
Can I use water to clean my hardwood floors?
It’s best to avoid using too much water. Instead, use a damp mop with a cleaner made for hardwood floors.
How can I prevent scratches on my hardwood floors?
Using area rugs in high-traffic areas and placing pads under furniture legs can help prevent scratches.
Is it necessary to refinish hardwood floors?
Yes, refinishing is important to restore the shine and protect the wood. It’s usually needed every few years.
What type of polish should I use on my hardwood floors?
Choose a polish that is designed for hardwood floors, either water-based or oil-based, depending on your finish.
How long does it take for a new finish to cure?
After applying a new finish, you should allow it to cure for about 7 days for the best results.
What should I do if my hardwood floors have deep scratches?
For deep scratches, you may need to use a wood filler or sand and refinish that area to make it look even again.


