Refinishing wood floors can breathe new life into your home. This guide will help you understand the process and give you tips on how to achieve stunning results. Whether you’re a DIY enthusiast or considering hiring a professional, knowing the basics will make a big difference. Let’s explore the steps and key points to make your wood floors look amazing again!
Thank you for reading this post, don't forget to subscribe!Key Takeaways
- Refinishing wood floors involves sanding down the surface and applying a new finish to restore their beauty.
- Proper preparation is essential, including cleaning and repairing any damages before starting the refinishing process.
- Choosing the right stain and finish can dramatically change the look and durability of your floors.
- Regular maintenance is important to keep your refinished floors looking great for years to come.
- Deciding between DIY and hiring a professional depends on your skills, budget, and the condition of your floors.
Understanding the Basics of Wood Floor Refinishing
What is Wood Floor Refinishing?
Wood floor refinishing is the process of restoring the beauty of your hardwood floors by sanding down the top layer and applying a new finish. This method can remove scratches and stains, bringing back the original shine. Unlike resurfacing, which simply adds a new layer over the old, refinishing strips away the old finish entirely.
Benefits of Refinishing Your Wood Floors
Refinishing your wood floors offers several advantages:
- Restores Appearance: Old, worn floors can look brand new, enhancing your home’s overall aesthetic.
- Increases Longevity: Properly refinished floors can last many more years, protecting your investment.
- Adds Value: Well-maintained hardwood floors can increase your home’s value, making it more appealing to potential buyers.
When to Consider Refinishing
Before starting the refinishing process, assess the condition of your hardwood floors. Here are some signs that indicate it might be time to refinish:
- Visible Wear: Areas where the finish is worn down to the bare wood.
- Scratches and Dents: Deep scratches or dents that cannot be removed with surface cleaning.
- Fading or Discoloration: Significant changes in color or appearance due to sun exposure or other factors.
Remember, if your floors are extensively damaged, it may be more cost-effective to replace them rather than refinish.
In summary, understanding the basics of wood floor refinishing can help you make informed decisions about maintaining and enhancing your hardwood floors. Whether you choose to do it yourself or hire a professional, refinishing can breathe new life into your home.
Preparing Your Wood Floors for Refinishing
Before diving into the refinishing process, proper preparation is essential to achieve stunning results. Here’s how to get your wood floors ready:
Clearing and Cleaning the Area
- Remove all furniture and rugs from the room to create a clear workspace.
- Sweep and vacuum the floors thoroughly to eliminate dust and debris. This step is crucial for a smooth finish.
- Cover any fixtures or appliances with plastic tarps to protect them from dust.
Repairing Damages and Imperfections
- Inspect your floors for any scratches, dents, or gaps.
- Use wood filler to fill in gaps and sand down any rough spots.
- Ensure that all repairs are smooth and even to allow for a uniform finish.
Choosing the Right Tools and Materials
- Gather essential tools such as:
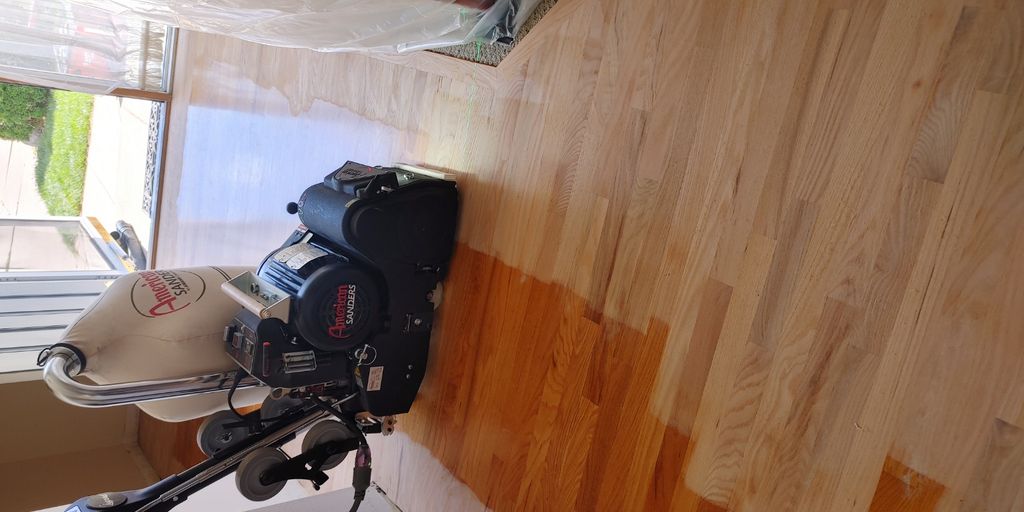
- Drum sander and edge sander
- Sandpaper (various grits)
- Wood filler
- Vacuum and damp cloth
- Make sure you have enough time to complete the project without rushing. This is not a one-day job!
Proper preparation is key to achieving a flawless finish. Skipping these steps can lead to adhesion issues and an uneven appearance in the final coat.
By following these steps, you’ll set the stage for a successful refinishing project that will breathe new life into your wood floors!
Sanding Your Wood Floors

Sanding is a crucial step in the wood floor refinishing process. It helps to smooth out the surface and remove any old finishes, preparing the wood for a fresh coat. Always sand with the grain to avoid scratches and achieve a beautiful finish.
Importance of Sanding
- Prepares the surface for staining and finishing.
- Removes imperfections and old finishes.
- Ensures better adhesion of the new finish.
Types of Sanding Equipment
| Equipment Type | Description |
|---|---|
| Drum Sander | Ideal for large areas; uses coarse grit sandpaper to remove old finishes. |
| Edge Sander | Perfect for corners and edges where the drum sander can’t reach. |
| Orbital Sander | Good for final smoothing; less aggressive than a drum sander. |
Step-by-Step Sanding Process
- Clear the Area: Remove all furniture and rugs to create a clean workspace.
- Choose the Right Grit: Start with coarse grit (40-60) to remove the old finish, then progress to medium (80-120) and finally fine grit (220) for a smooth surface.
- Sand with the Grain: Always sand in the direction of the wood grain to prevent damage.
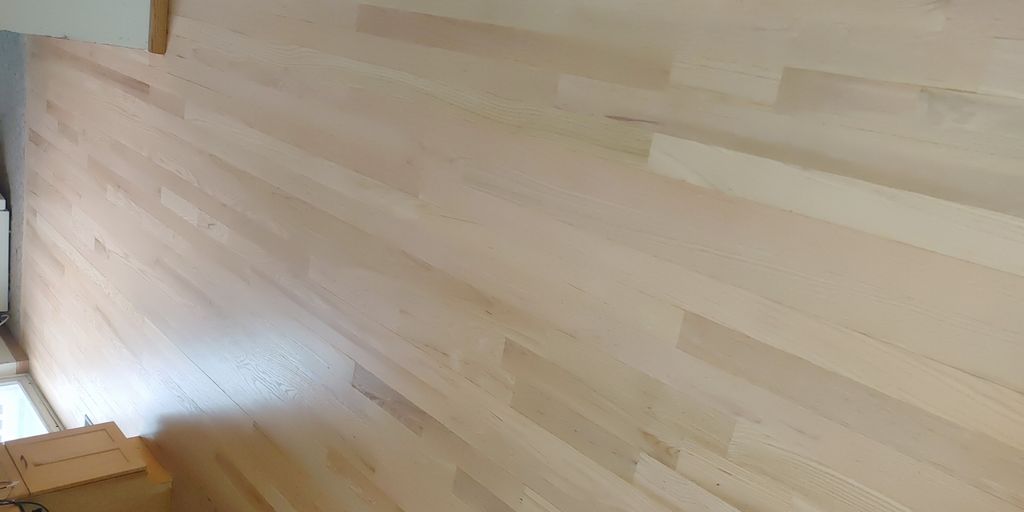
- Clean Up: After sanding, vacuum the area thoroughly to remove all dust and debris.
Proper sanding is essential for achieving a stunning finish on your wood floors. Taking the time to do it right will pay off in the final appearance of your floor.
Choosing the Right Stain for Your Wood Floors
Selecting the right stain for your hardwood floors is essential for achieving the desired look and durability. The stain you choose can dramatically change the appearance of your space. Here are some key points to consider:
Understanding Different Types of Stains
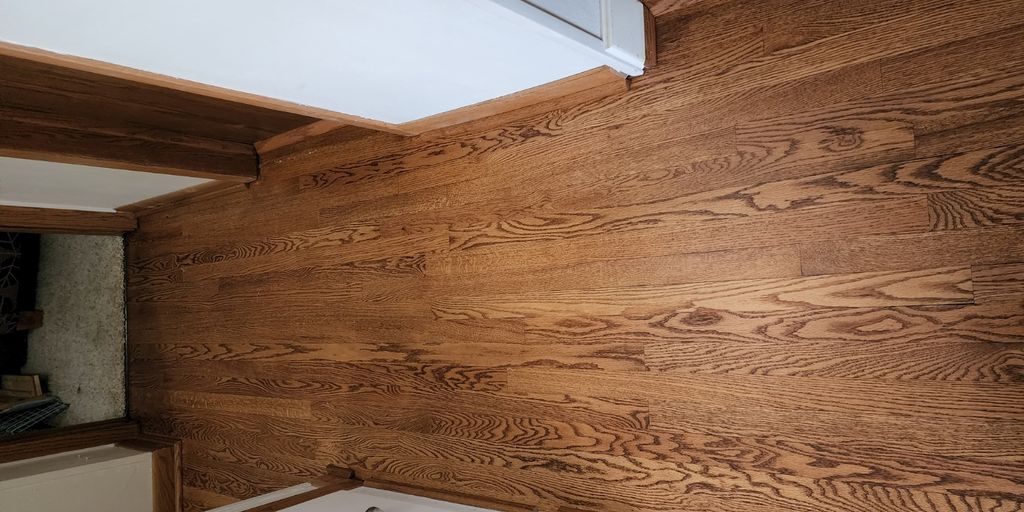
- Oil-Based Stains: These are the most common and offer long-lasting color. They penetrate deeply into the wood, providing a rich finish.
- Water-Based Stains: These dry faster and are more environmentally friendly. They are ideal for those who want a quicker project turnaround.
- Hybrid Stains: Combining the benefits of both oil and water-based stains, these offer versatility in application and finish.
Testing Stain Colors
Before making a final decision, it’s crucial to test multiple stain samples:
- Apply the stain to a small, inconspicuous area of your floor.
- Observe how the color looks at different times of the day and under various lighting conditions.
- Take notes on how each stain appears in both natural and artificial light.
Application Techniques for Stains
- Preparation: Ensure your floors are clean and sanded to remove any old finishes.
- Application: Use a brush or roller to apply the stain evenly, following the wood grain. Wipe off any excess to avoid blotchiness.
- Drying Time: Allow the stain to dry completely before applying a finish.
Choosing the right stain not only enhances the beauty of your hardwood floors but also protects them from wear and tear. Take your time to find the perfect match for your home!
Applying the Finish to Your Wood Floors
Types of Finishes: Oil-Based vs. Water-Based
When it comes to finishing your wood floors, you have two main options: oil-based and water-based finishes. Oil-based finishes are known for their durability and rich color, making them ideal for high-traffic areas. However, they take longer to dry and have a stronger odor. On the other hand, water-based finishes dry quickly and have less odor, making them a popular choice for homeowners looking for a more eco-friendly option.
Step-by-Step Application Process
- Preparation: Start by cleaning the floor thoroughly. Remove all dust and debris using a vacuum and a tack cloth.
- First Coat: Use a high-quality brush or roller to apply the first coat of finish, following the wood grain for even coverage. Allow it to dry completely.
- Intermediate Sanding: Once the first coat is dry, lightly sand the surface to remove any imperfections. Clean the dust before applying the next coat.
- Additional Coats: Apply 2-3 more coats, sanding lightly between each one. This ensures a smooth and durable finish.
Common Mistakes to Avoid
- Skipping the sanding process can lead to a rough finish.
- Applying too thick a coat may cause bubbles and uneven drying.
- Ignoring safety precautions can put you at risk; always wear protective gear.
Remember, patience and attention to detail are key to achieving a flawless finish. Take your time and follow each step carefully to avoid common issues.
By following these guidelines, you can achieve a stunning finish that enhances the beauty of your wood floors and protects them for years to come. Don’t forget to allow adequate drying time between coats for the best results!
Maintaining Your Refinished Wood Floors

Once your floors have been refinished, proper maintenance is essential to keep them looking their best.
Regular Cleaning Tips
- Sweep and Mop: Regularly sweep and mop your floors to remove dirt and debris.
- Use the Right Products: Use hardwood floor cleaners that are safe for your specific finish. Avoid over-wetting or leaving behind a residue.
- Monthly Deep Clean: Consider using a professional wood flooring cleaner monthly for a thorough clean.
Protective Measures
- Use Rugs and Mats: Place rugs and mats in high-traffic areas to protect your floors from scratches and wear.
- Furniture Pads: Attach felt pads to the bottom of furniture legs to prevent scratches when moving furniture.
- Control Humidity: Maintain consistent humidity levels to prevent the wood from expanding and contracting.
Dealing with Wear and Tear
Even with the best care, hardwood floors can show signs of wear over time. For minor scratches, use a touch-up kit that matches your floor stain. For more significant damage, you may need to sand and refinish the affected area. Regular maintenance and prompt attention to issues will keep your floors looking beautiful for years to come.
Remember, maintaining your floors not only enhances their beauty but also extends their lifespan, ensuring you get the most out of your investment in refinishing.
DIY vs. Professional Wood Floor Refinishing
When it comes to refinishing your wood floors, you have two main options: doing it yourself or hiring a professional. Each choice has its own set of advantages and challenges.
Pros and Cons of DIY Refinishing
DIY refinishing can save you money, but it requires a significant investment of time and effort. Here are some key points to consider:
- Cost Savings: You can save up to 70% compared to hiring a Local Flooring Professional.
- Control: You have complete control over the project, allowing you to customize every detail.
- Satisfaction: Completing the project yourself can be incredibly rewarding.
However, DIY refinishing can also lead to mistakes that may require professional help to fix. If you’re not confident in your skills, it might be better to hire a pro.
Benefits of Hiring a Professional
Hiring a Local Flooring Refinisher can ensure a high-quality finish. Here are some reasons to consider professional services:
- Expertise: Professionals have the experience and tools to deliver flawless results.
- Time-Saving: They can complete the job more quickly and efficiently than most homeowners.
- Guaranteed Results: Many professionals offer warranties for their work, giving you peace of mind.
Cost Considerations
The average cost for professional floor refinishing services is around $1,800, but this can vary based on the size of the area and the condition of your floors. Weighing the costs against the potential for mistakes in a DIY project is crucial.
Ultimately, the choice between DIY and professional refinishing depends on your budget, skill level, and the quality you desire. If your floors are in poor condition, hiring a professional may be the best option to avoid costly mistakes.
Troubleshooting Common Refinishing Problems
Refinishing your wood floors can be a rewarding project, but sometimes things don’t go as planned. Here are some common issues you might face and how to tackle them effectively.
Dealing with Uneven Stain
Uneven staining can ruin the look of your floors. To avoid this, always test the stain on a small area first. If you notice uneven spots:
- Sand the affected area lightly.
- Reapply the stain, ensuring even coverage.
- Wipe off excess stain promptly to prevent blotchiness.
Fixing Bubbles in the Finish
Bubbles in the finish can occur due to improper application. To fix this:
- Allow the finish to dry completely.
- Lightly sand the bubbled area with fine-grit sandpaper.
- Clean the dust and reapply the finish carefully.
Addressing Lingering Odors
Sometimes, refinishing can leave behind unpleasant odors. To minimize this:
- Ensure proper ventilation during and after the process.
- Use fans to circulate air.
- Consider using odor-neutralizing products.
Remember, patience and attention to detail are key to achieving a professional-looking finish on your hardwood floors. If problems persist, consulting with a professional can provide additional guidance and solutions.
By being aware of these common issues and knowing how to address them, you can ensure your refinishing project ends with stunning results. Whether you’re dealing with uneven stains, bubbles, or odors, there’s always a way to fix it and enjoy your beautiful wood floors again!
Enhancing Your Home with Refinished Wood Floors
Refinished wood floors can dramatically transform your home, adding warmth and elegance. A well-refinished floor not only enhances beauty but also increases property value. Here are some ways to enhance your space:
Choosing Complementary Decor
- Select furniture that matches the wood tone of your floors.
- Use area rugs to define spaces and add color.
- Incorporate natural elements like plants to create a cozy atmosphere.
Maximizing Natural Light
- Keep window treatments light to allow more sunlight in.
- Use mirrors to reflect light and make the space feel larger.
- Choose light-colored decor to complement the warm tones of your wood floors.
Creating a Cohesive Look
- Maintain a consistent color palette throughout your home.
- Use similar wood tones in furniture and accents to tie the room together.
- Consider open floor plans to create a seamless flow between spaces.
Investing in refinished wood floors is a smart choice for homeowners looking to elevate their living spaces. Not only do they look stunning, but they also provide a solid foundation for your home’s aesthetic.
By focusing on these elements, you can create a beautiful and inviting environment that showcases your newly refinished wood floors. Remember, the right decor and lighting can make all the difference in achieving a stunning result!
Eco-Friendly Wood Floor Refinishing Options

Benefits of Eco-Friendly Products
Choosing eco-friendly products for wood floor refinishing not only helps the environment but also improves indoor air quality. Using low-VOC finishes can significantly reduce harmful emissions in your home. Here are some benefits:
- Sustainability: Eco-friendly products often come from sustainable sources, reducing deforestation.
- Healthier Home: Low-VOC finishes contribute to better indoor air quality, making your home safer for your family.
- Durability: Many eco-friendly finishes are just as durable as traditional options, ensuring your floors look great for years.
Choosing Sustainable Materials
When selecting materials for refinishing, consider:
- Water-Based Polyurethane: This option dries quickly and is less harmful to the environment compared to oil-based finishes. It provides a clear, non-yellowing finish that enhances the wood’s natural beauty.
- Hardwax Oil: This finish is made from natural oils and waxes, offering a beautiful matte look while being eco-friendly.
- Reclaimed Wood: Using reclaimed wood not only gives your floors a unique character but also reduces waste and the need for new materials.
Reducing Waste During Refinishing
To minimize waste during your refinishing project:
- Plan Ahead: Measure your space accurately to avoid over-purchasing materials.
- Recycle Old Finishes: Dispose of any leftover products responsibly, and consider recycling options.
- Use Leftover Materials: If you have extra stain or finish, use it for touch-ups or smaller projects around the house.
Embracing eco-friendly options in wood floor refinishing not only benefits the planet but also enhances the beauty and safety of your home. By choosing sustainable materials and practices, you can achieve stunning results while being kind to the environment.
Safety Tips for Wood Floor Refinishing
Refinishing wood floors can be a rewarding project, but safety should always come first. Here are some essential tips to keep in mind:
Protective Gear and Equipment
- Always wear protective gear such as gloves, goggles, and a dust mask to shield yourself from dust and chemicals.
- Use knee pads if you’ll be working on your knees for extended periods.
- Ensure your footwear is slip-resistant to prevent accidents on smooth surfaces.
Ensuring Proper Ventilation
- Good ventilation is crucial when working with stains and finishes. Open windows and doors to allow fresh air to circulate.
- Consider using fans to help disperse fumes and improve air quality.
- If possible, work outdoors or in a well-ventilated garage.
Handling Chemicals Safely
- Always read the labels on products to understand their hazards and proper usage.
- Store chemicals in a safe place, away from children and pets.
- Dispose of any leftover materials according to local regulations to minimize environmental impact.
Remember, taking the right precautions can help you avoid accidents and ensure a successful refinishing project. Safety first leads to stunning results!
When refinishing your wood floors, safety should always come first. Make sure to wear protective gear like goggles and masks to shield yourself from dust and fumes. It’s also wise to keep the area well-ventilated. For more tips and to learn about our flooring services, visit our website today!
Final Thoughts on Wood Floor Refinishing
Refinishing your wood floors can truly bring them back to life, making them look beautiful and fresh again. By following the steps outlined in this guide, you can achieve stunning results that enhance the charm of your home. Remember, preparation is key—cleaning, sanding, and choosing the right finish will make a big difference. Whether you decide to tackle this project yourself or hire a professional, the effort will be worth it. Your hardwood floors deserve the best care, and with regular maintenance, they can last for many years to come. So, roll up your sleeves and get ready to enjoy your gorgeous, newly refinished floors!
Frequently Asked Questions
What is wood floor refinishing?
Wood floor refinishing is the process of sanding down the surface of wood floors and applying a new finish to restore their appearance and protect them.
How often should I refinish my wood floors?
Typically, wood floors should be refinished every 7 to 10 years, but it can vary based on foot traffic and wear.
Can I refinish my wood floors myself?
Yes, refinishing can be a DIY project, but it requires proper tools and techniques to achieve good results.
What are the benefits of refinishing hardwood floors?
Refinishing can restore the beauty of your floors, increase their lifespan, and enhance the value of your home.
What tools do I need for refinishing?
You’ll need a drum sander, sandpaper, a vacuum, wood filler, and finish products like polyurethane.
Is it necessary to sand floors before refinishing?
Yes, sanding is essential to remove the old finish and prepare the wood for the new coat.
What types of finishes can I use for wood floors?
You can use oil-based or water-based finishes, each with its own advantages.
How long does the refinishing process take?
The entire process can take a few days, including drying times between coats.


